HubSpot is CRM Platform with a lot of sophisticated marketing tools that I barely understand. Marketing people will have a much better handle on that functionality. But, in addition to a great CRM, they also offer a website CMS that allows you to create full web pages and blogs inside the platform. I’m just going to run through a little bit about my experience working with HubSpot CMS to deliver custom designs to clients.
This post will be interesting to developers and those thinking about moving to the HubSpot CMS for their web presence, or landing pages.
Drag and drop page builder
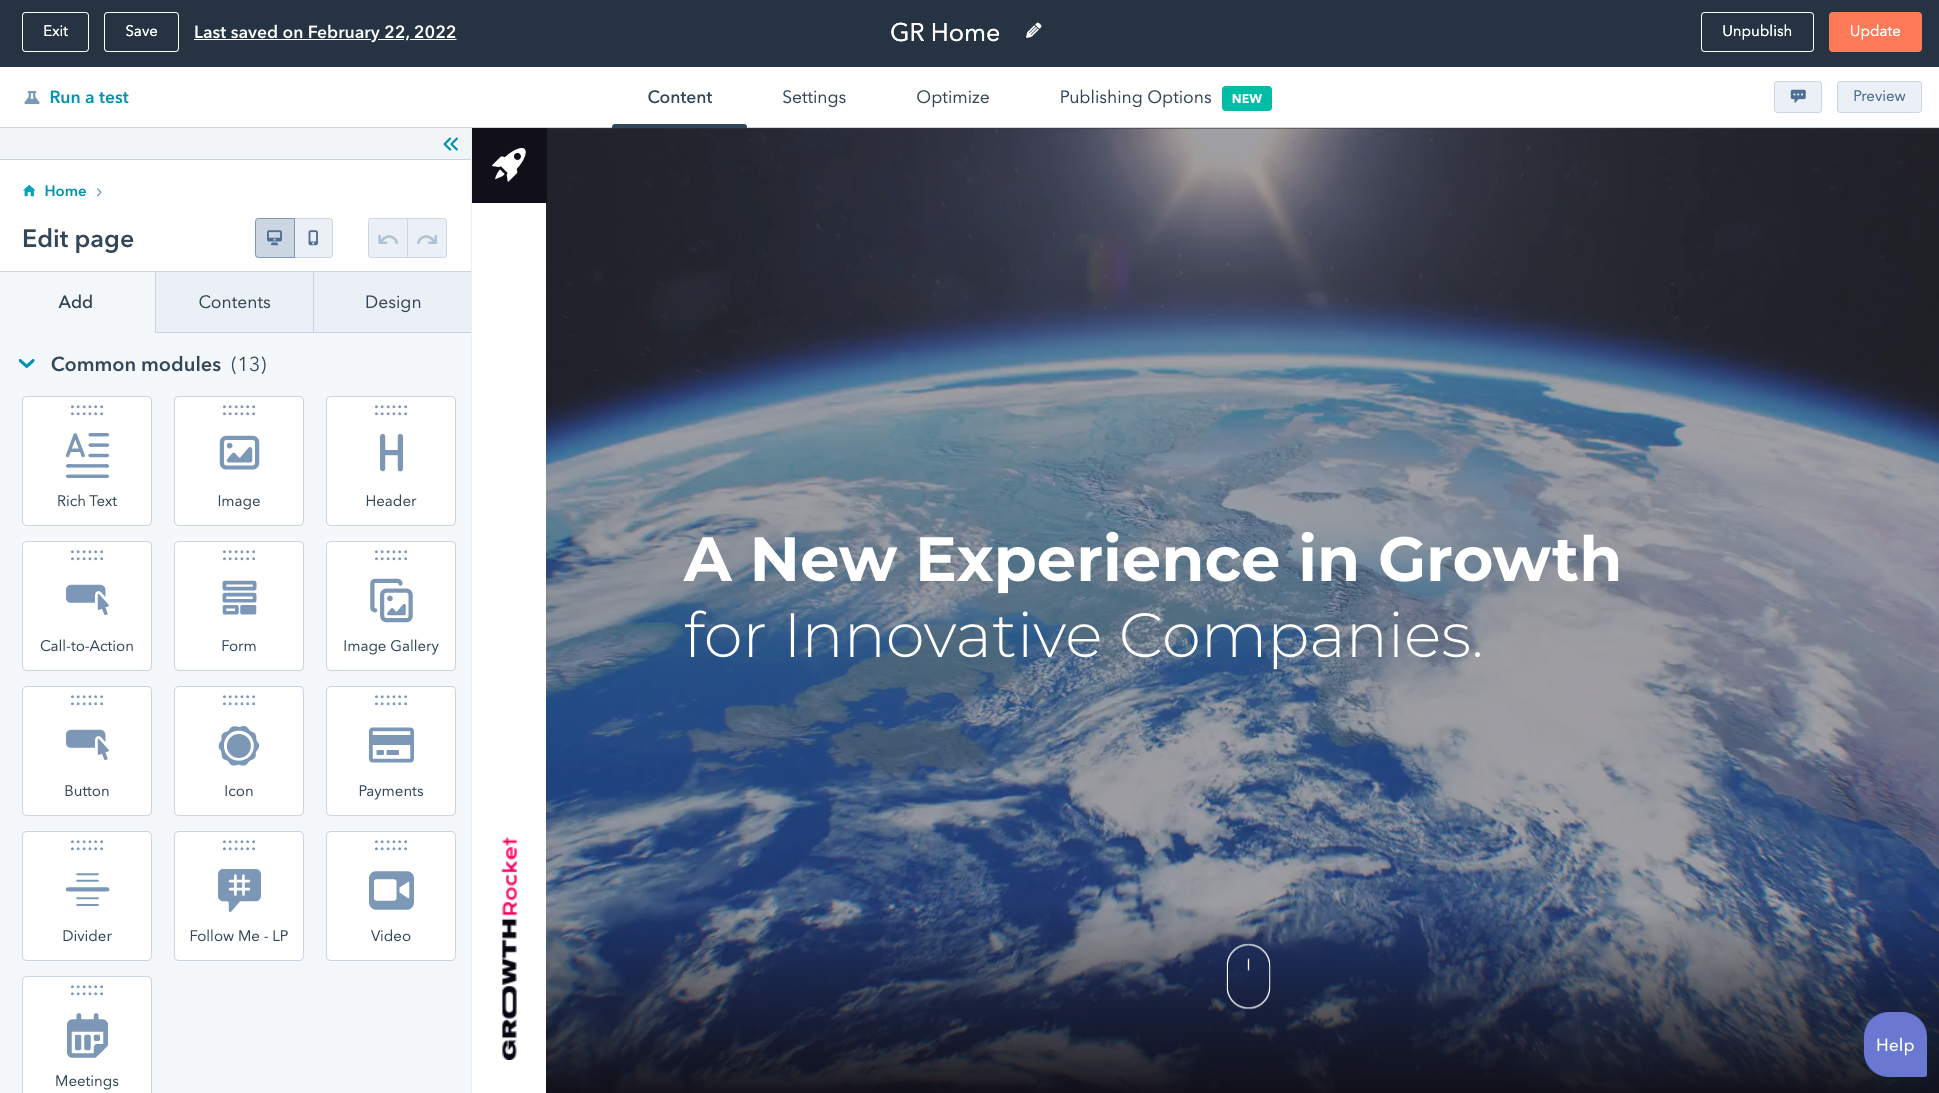
A big feature of the HubSpot CMS (both for users and developers) is the built-in page builder which provides the user the ability to drag and drop rows and columns of content, create sections with custom background colors/images, add padding, margin, all from within a WYSIWYG interface. It’s not the slickest interface, but it gets the job done, and it is baked right into HubSpot.
You can literally start with a blank template and someone on the marketing team could build up the page slowly by adding each element and styling them.

But, for the content or marketing person, doing a full layout that looks good on both desktop and mobile is still difficult to do well manually, and it means doing it for every page which can be way too time-consuming. That’s where custom templates come in.
Coding a custom HubSpot page template
In the job I did recently the goal was to create a few key templates that would get the staff 90% of the way there to a great looking page, without having to do much work.
It didn’t take me long to get productive in HubSpot. The templates are mostly just standard HTML/CSS/JS, along with the HubL language to add any cms-specific elements into the templates. If you’ve built templates in PHP or HandleBars or Django, or other templating languages — it’s very similar, and very easy to use. The docs are excellent.
You just need to know a few key things about the CMS — how to add Drag and Drop functionality to areas of the page, and HubSpot’s “module” concept. If you’re familiar with WordPress’ Gutenberg block system, it’s kinda like that. Most of the action happens with modules. Modules such as Rich Text, Heading, Image, Gallery, Call to Action, Button, etc…, along with any custom ones you want to build.
Adding a drag and drop area to a template is as simple as this:
{% dnd_area "unique_name", class="main" %}
    // insert your sections - rows - columns - modules here....
{% end_dnd_area %}
You can prepopulate that area with sections, rows, columns, and modules. These are HubL specific elements that you need to know about…. But the great thing is that even though you’re coding in the layout that will initially appear on the page, the end user can remove/replace them if they want. That means you don’t need to create as many templates: you can have some multi-purpose templates that can be easily customized by the end-user.
Inside the dnd_area, you can prepopulate it with sections and give the styles and settings default values (which the user can change afterwards). Here’s an example of a part of a template that shows testimonials inside a dnd_area. You’ll see the HubL syntax and the way you build out a layout with rows/columns etc…
{# Heading section #}
{% dnd_section
background_color={ r: 249, g: 249, b: 249, a: 1 },
padding={
'default': { 'top': 150, 'bottom': 0 },
'mobile': { 'top': 100, 'bottom': 0 }
}
vertical_alignment='MIDDLE'
%}
{% dnd_column offset=0, width=8 %}
{% dnd_row %}
{% dnd_module path='../modules/heading',
title_tag='h2',
align='left',
subtitle='Testimonials'
title='Clients Who <span class="underline02">Trust Us</span>'
description='Our team has many skills so we’re able to offer a wide array of services. Far away, behind the word mountains, far from the countries Vokalia.'
%}
{% end_dnd_module %}
{% end_dnd_row %}
{% end_dnd_column %}
{% dnd_column offset=8, width=4 %}
{% end_dnd_column %}
{% end_dnd_section %}
{# End Heading section #}
{# Testimonails section #}
{% dnd_section
background_color={ r: 249, g: 249, b: 249, a: 1 },
padding={
'default': { 'top': 40, 'bottom': 80, 'left': 0, 'right': 0 },
'mobile': { 'top': 40, 'bottom': 80, 'left': 0, 'right': 0 }
},
full_width=True,
vertical_alignment='MIDDLE'
%}
{% dnd_column
padding={
'default': { 'left': 0, 'right': 0 },
'mobile': { 'left': 0, 'right': 0 }
},
offset=0, width=12 %}
{% dnd_row %}
{% dnd_module path='../modules/testimonials-slider',
width='10vw'
%}
{% end_dnd_module %}
{% end_dnd_row %}
{% end_dnd_column %}
{% end_dnd_section %}
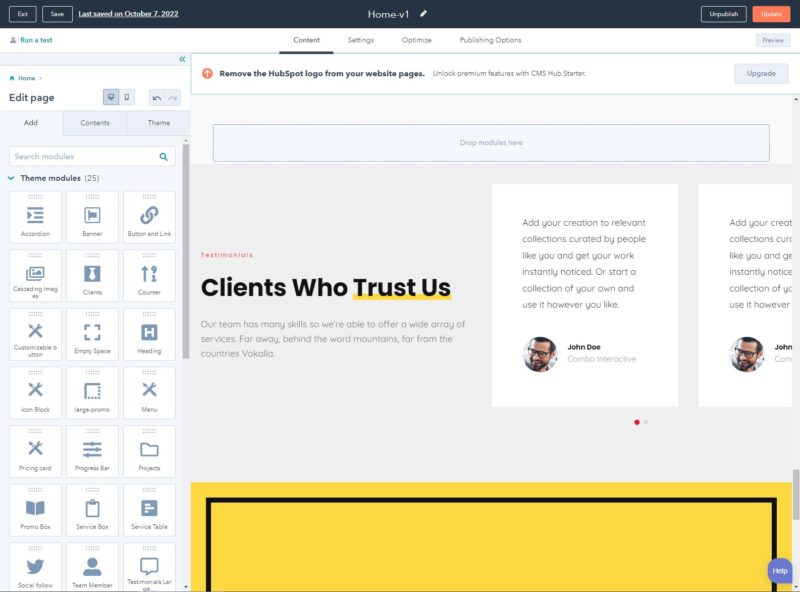
{# End Testimonails section #}Here’s this section on the front end:

But, a marketer might want to change the layout you initially made so that the “Clients Who Trust Us” is beside the slider. They can literally just drag it there in the page editor, even if you have it coded in the template another way:
All of the heavy lifting to make these pages editable is done by the HubSpot platform. Which is great. You can focus on just getting something to your client without too much dev cost.
Of course, if you want to lock down the template so it can’t be changed then you just don’t use dnd_areas.
How/where do you edit these templates?
You may be wondering what the dev environment is like for working in HubSpot. You have a few options:
- Use their browser-based editor
- Use their command-line tool and a code editor locally, such as VS Code,
- Use a hybrid of both
Their browser-based editor is quite powerful and gives you syntax highlighting, and checks for errors in the code. You can literally do your entire project in the browser. Zero setup time.
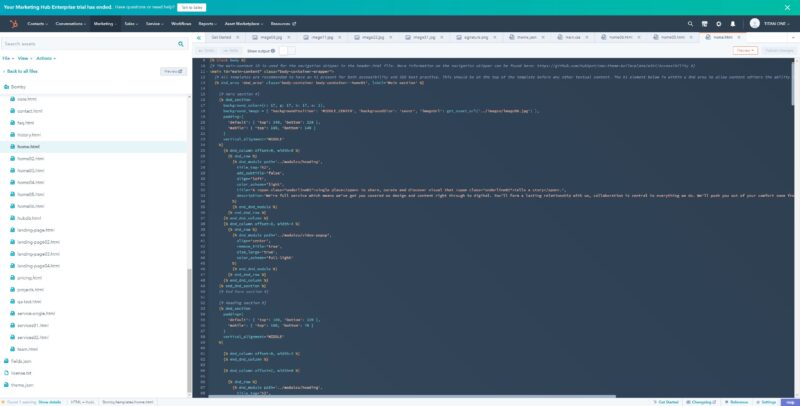
Sometimes, though, when I’m doing a lot of changes to a page it is a bit faster to code locally in VS Code. And I can then use my normal Git workflow, etc… HubSpot has their own command line tool that allows you to connect to your account, and manage files locally. A convenient Watch command automatically pushes the changes to the site.
hs watch [--src] [--dest]It can be a bit faster to work this way for certain changes. To get syntax highlighting and etc. locally, you can install a HubSpot VS Code extension.
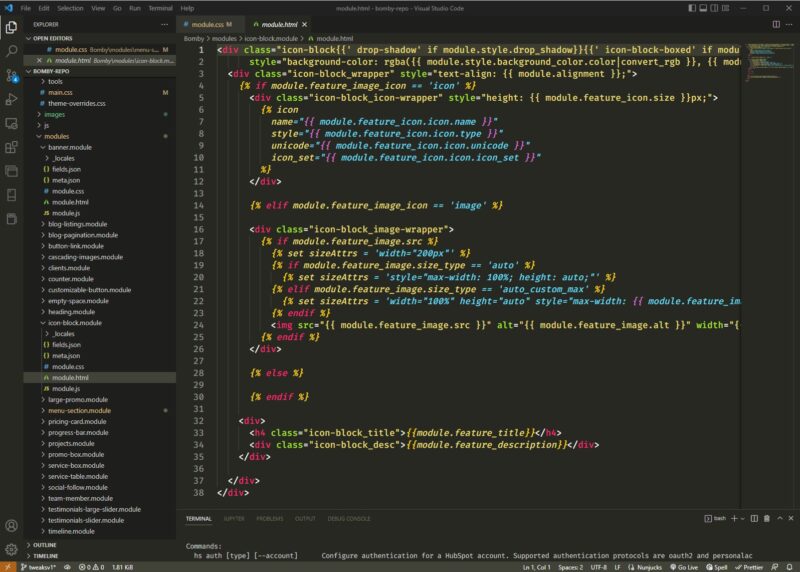
When you are working locally, it’s local editing, but you’re not able to preview locally. That all happens in the cloud. I would have preferred a full local sandbox, but that’s not the way it works.
Building custom modules
Since modules in HubSpot are the main way to add functionality to a page, it is sometimes necessary to build something custom for a client. For example, say you wanted a very specific branded hero section, or perhaps a work portfolio grid.
Unlike custom blocks in WordPress, which are notoriously complicated to build and have poor developer documentation, I found building HubSpot modules was easy. I was up and running in minutes.
The easiest way to create a module is inside their online editor. You press a button and it creates all the necessary files that the module needs along with the directory structure.
When you’re editing a module using the online editor, it actually presents you all of your files together on one page. Kind of like a Vue component. You have your template section, your JavaScript section and the CSS section along with a panel on the right to create custom fields.
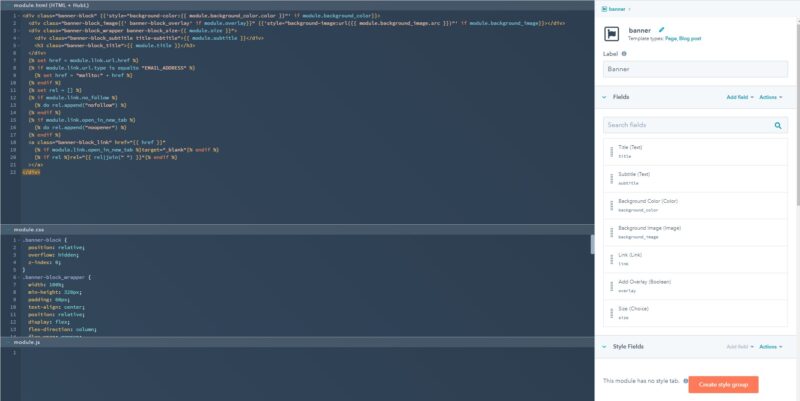
My favorite feature, by far, is the HubSpot interface for creating new custom fields for the module. If you’ve ever worked with ACF in WordPress, you’ll know how convenient it is to create custom data fields with an good interface. It also provides an easy way to get the exact code snippet you need to add it to the template.
Behind the scenes when you create a fields, HubSpot builds out a JSON file that contains all of the custom fields. That file is located in the module folder. Here’s an example of the JSON that gets created by the GUI field builder:
[ {
  "id" : "f50cacb7-f890-79cd-c187-ffd5c35ed71f",
  "name" : "title",
  "display_width" : null,
  "label" : "Title",
  "required" : false,
  "locked" : false,
  "validation_regex" : "",
  "allow_new_line" : false,
  "show_emoji_picker" : false,
  "type" : "text",
  "default" : "Let’s Work!"
}, {
  "id" : "09688eaa-b6b3-bca4-58bc-84d1eb81d1f2",
  "name" : "subtitle",
  "display_width" : null,
  "label" : "Subtitle",
  "required" : false,
  "locked" : false,
  "validation_regex" : "",
  "allow_new_line" : false,
  "show_emoji_picker" : false,
  "type" : "text",
  "default" : "So What’s Next?"
}, {
  "id" : "e0c202c7-32fe-396f-c9a8-bdbc274b5264",
  "name" : "background_color",
  "display_width" : null,
  "label" : "Background Color",
  "required" : false,
  "locked" : false,
  "type" : "color",
  "default" : {
    "color" : "#111111",
    "opacity" : 100
  }
}, {
  "id" : "9d6d2569-c03e-3d1f-3a60-847da94921f7",
  "name" : "background_image",
  "display_width" : null,
  "label" : "Background Image",
  "required" : false,
  "locked" : false,
  "responsive" : true,
  "resizable" : false,
  "show_loading" : false,
  "type" : "image",
  "default" : {
    "size_type" : "auto",
    "src" : "https://f.hubspotusercontent10.net/hubfs/20148114/team04-1.jpg",
    "alt" : "team04-1",
    "loading" : "lazy",
    "width" : 600,
    "height" : 900,
    "max_width" : 600,
    "max_height" : 900
  }
}, {
  "id" : "1aa3af9f-bcf3-dc40-5fc9-d23d8cba9098",
  "name" : "link",
  "display_width" : null,
  "label" : "Link",
  "required" : false,
  "locked" : false,
  "supported_types" : [ "EXTERNAL", "CONTENT", "FILE", "EMAIL_ADDRESS", "BLOG" ],
  "show_advanced_rel_options" : false,
  "type" : "link",
  "default" : {
    "url" : {
      "type" : "EXTERNAL",
      "href" : "http://themes.tvda.pw",
      "content_id" : null
    },
    "open_in_new_tab" : false,
    "no_follow" : false
  }
}, {
  "id" : "9ec17f76-27bf-7b6e-2843-626523c010e6",
  "name" : "overlay",
  "display_width" : null,
  "label" : "Add Overlay",
  "required" : false,
  "locked" : false,
  "visibility" : {
    "controlling_field" : "9d6d2569-c03e-3d1f-3a60-847da94921f7",
    "controlling_value_regex" : null,
    "operator" : "NOT_EMPTY",
    "access" : null,
    "hidden_subfields" : null
  },
  "display" : "toggle",
  "type" : "boolean",
  "default" : true
}, {
  "id" : "9b03074d-7824-f051-9c7a-689b10251b0e",
  "name" : "size",
  "display_width" : null,
  "label" : "Size",
  "required" : false,
  "locked" : false,
  "display" : "select",
  "choices" : [ [ "small", "Small" ], [ "medium", "Medium" ], [ "large", "Large" ] ],
  "type" : "choice",
  "default" : "small"
} ]
So, you could create fields directly in JSON if you wanted. What I do is use the GUI to create all my custom data fields, and then switch to working locally on HTML/CSS/JS. Super fast work flow.
The great thing about these fields is that the interface for the end-user is standardized and you don’t have to reinvent the wheel. If you have selected a color picker field, the end user will have a full color picker in the editor. Very similar to the way Advanced Custom Fields works in WordPress.
Site Themes
I’ve been mainly focusing on page templates and modules, but HubSpot has site themes as well. Site themes provide all the page templates, custom modules, and global styles for a website into one package. Like with other platforms, you can buy prebuilt themes. Unlike with WordPress, there aren’t that many themes available off-the-shelf in the HubSpot marketplace.
But, because the page builder is so powerful, and the documentation is so good, it might be easier and better for your client just to build your own theme.
The easiest way to build a theme is to use the command line, which will generate all the necessary files and create a boilerplate theme as a starting point.
hs create website-theme my-website-themeBecause the templates are mostly just HTML CSS JS with a bit of HubL, it’s very easy to get started building themes if you know your basics.
All in all, I’m pleasantly surprised by how easy it is to do development in HubSpot. It’s possible to get a free account and try out HubSpot dev yourself.
I hope this has been helpful for anyone looking into HubSpot for building their web presence.